Welcome to our Hot-To Guide to ProofPoint Essentials (PPE), The IT Agency’s latest anti-SPAM service protecting your business.
If you want more information on PPE you can watch this video or read our blog on our selection process.
There are three main elements to PPE that you will interface with on a regular basis:
- Individual Emails
- Quarantine Digests
- ProofPoint Essentials Portal
Individual Emails
Every external email that you receive should have the following message appended at the bottom:

This confirms that the email was processed by PPE.
If you open an email and you think it’s SPAM, then use the ‘Click here to report this email as spam‘ option at the base of the email.
This will report the email DIRECT to ProofPoint in the shortest possible time.
Please, it is not necessary to forward such emails to the Help Desk.
Quarantine Digest
In regard to the frequency of the Quarantine Digests YOU can change the settings to suit yourself via the Portal (see below).
As a start we have configured Quarantine Digests to start at 6 am daily with digest occurring every 4 hours during the day.
A Quarantine Digest will appear in your Inbox just as a regular email.
The branding will make it obvious that it’s a Quarantine Digest.

When you open the Quarantine Digest email you can confirm that your name and email address are correct.
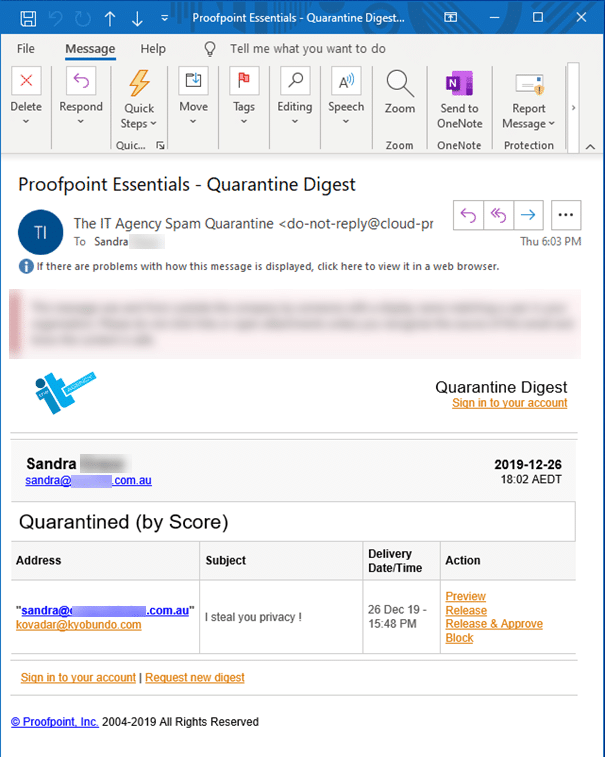
In the body of the email will be listed all the emails that were quarantined since the last digest.
Each line shows the senders name and email address (in orange), the subject, delivery date/time plus a number of actions.
All told the Quarantine Digest contains the following Actions and Results:
| ACTION | RESULT |
| Sign into your account | Refer section below |
| Preview | Refer section below |
| Release | Use this option if you just want to release this single email for delivery to your inbox |
| Release & Approve | Use this option if you expect to receive regular emails from a sender who was blocked |
| Block | Blocking SPAM from one off random senders is pointless. ProofPoint Essentials was chosen because we set SPF to ‘hard fail’ specifically to block these emails. |
| Request new digest | The default Quarantine Digest is four hours, so you can use this option to request an out of sync Digest. |
Preview
You select this option if you want to safely view the contents of the email to confirm whether it is spam or a legitimate email.
Here we have used preview on a quarantine email to check the contents.
A brief look confirms that PPE has correctly identified and blocked a spam email.
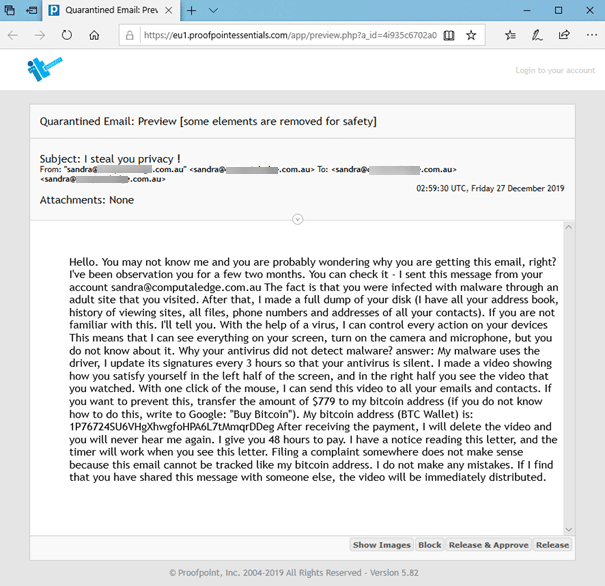
When you preview an email, to verify the validity of the email, you are presented with some of the same actions:
- Show Images
- Block
- Release & Approve
- Release
It’s unlikely that you will need to use option 1 to determine if the email is legitimate.
Sign in to your Account
You select this option from the Quarantine Digest or directly using this link:
https://eu1.proofpointessentials.com/app/login.php
Your logon to PPE is linked to your Office 365 account using single sign-on, so you don’t need to remember another userid or password.
As long as you logon to your computer using your Office 365 account you only need to click on the Office 365 Account button to access the PPE portal.

We recommend you spend a few minutes checking the options within the portal at your earliest convenience.
Quarantine
When you logon to the PPE Digest portal you are dropped into the quarantine search panel.
There are three other TABS:
- SETTINGS – see below
- ARCHIVE – we are not offering PPE Advanced to our clients
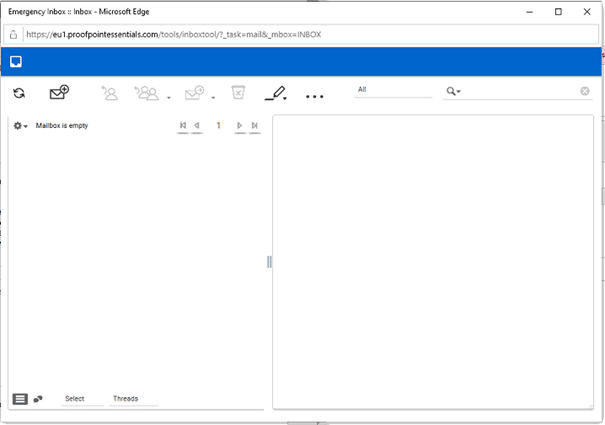
- EMERGENCY INBOX – automatically becomes available when your email server is offline
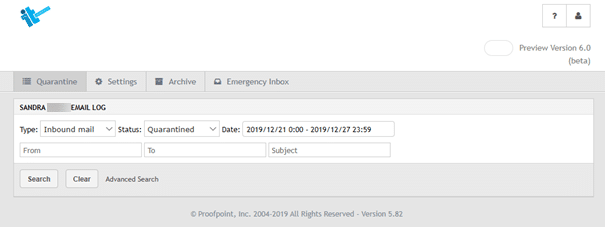
The options here allow you to search for the type of email (inbound or outbound), the status of each email, a date range, from, to and a subject.
Email Status includes the following options:
- Any
- Quarantine
- In attachment Defense Sandbox
- Reported (Misclassified)
- Blocked
- Cleared
- Cleared (but Queued for delivery)
- Cleared (but Bounced by destination)
- Cleared (Released from quarantine)
Use the options and click SEARCH to display any emails matching your selections.
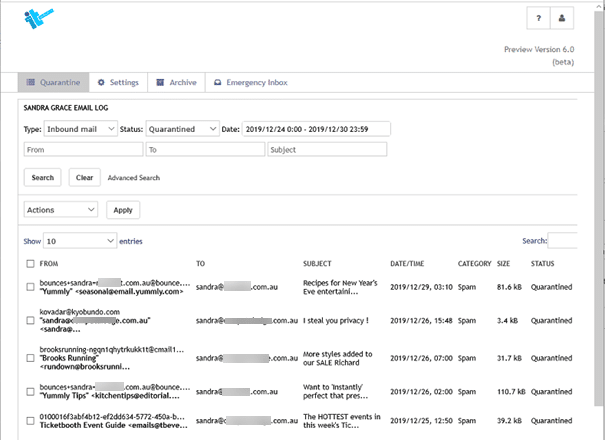
Once you have a selection of emails you now have new Actions, view is not one of them.
Use the TICK box to apply an action to one or multiple quarantined emails.
The actions include:
| ACTION | RESULT |
| Release from quarantine |
Use this option if you just want to release this single email for delivery to your inbox |
| Release & Approve |
Use this option if you expect to receive regular emails from a sender who was blocked The sender email address will be added to the Safe Sender list |
| Resend | Use this option for up to 30 days (default) to resend a quarantine email |
| Classify as spam | Report back to PPE that the email was not detected as spam and should have been detected as spam |
| Classify as clean | Report back to PPE that the email was incorrectly identified as spam |
| Hide email from logs | Use this if you don’t want to search for the email |
Settings
Across the top of the Setting page are tabs for: Profile, Aliases, Spam, Digests, Groups and Sender Lists
Settings – Profile
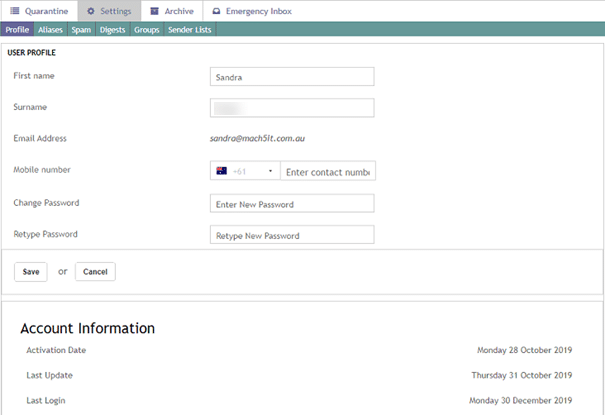
The first tab under settings displays your Profile.
Use this option to edit or change any of your settings.
Note that your user profile details have been sourced from your Officer 365 account – so they should be accurate.
The information is sync’d hourly with your Office 365 account.
We recommend you don’t change anything here.
The lower section of the page under ‘Account Information’ shows your Last Login details.
Settings – Aliases
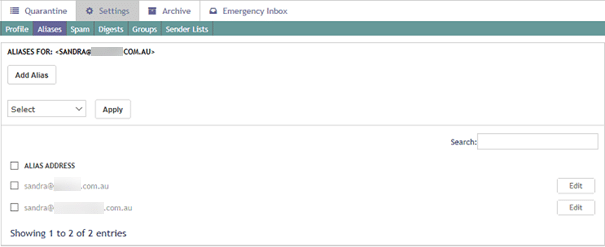
Your aliases have been obtained directly from your Office 365 account.
The information is sync’d hourly with your Office 365 account, so best not to change anything.
Settings – SPAM
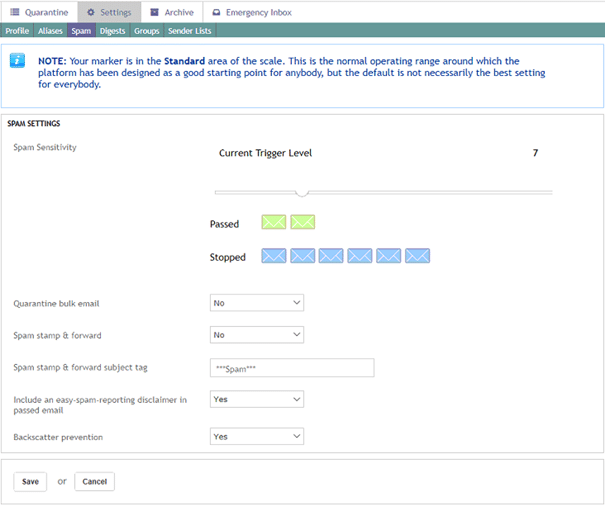
All of these settings are set as a default by The IT Agency.
Seven is the default.
Note: Please consult with The IT Agency BEFORE you make any changes.
The options allow you to adjust the sensitivity of spam detection.
Pass too much and you’ll allow spam through, pass too little and you’ll start blocking legitimate email.
You can block all newsletter type emails with the quarantine bulk email option.
Next you can allow all emails through, without quarantining them, and have PPE add ***Spam*** to the subject line.
Do so at your own risk.
The other options, Disclaimer and Backscatter, should stay enabled.
Settings – Digests
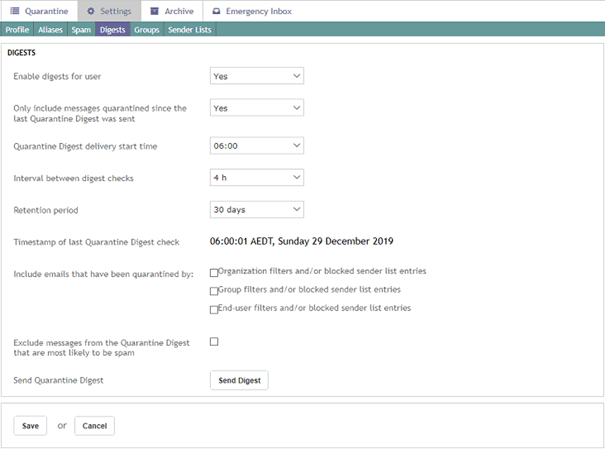
This tab allows you to adjust Quarantine Digests.
We have set the default options as per the image below.
You can adjust these settings to suit your requirements, e.g. if you only want 1 digest a day then set the start time to when you want the digest and set the interval to 24 hours.
Use the SAVE option at the bottom when you have finished.
Settings – Groups
This is informational only.
The TAB lists all the Office 365 groups your profile is linked to.
The groups are sync’d hourly with Office 365.
There’s nothing here you can change from within the PPE Portal.

Settings – Sender Lists
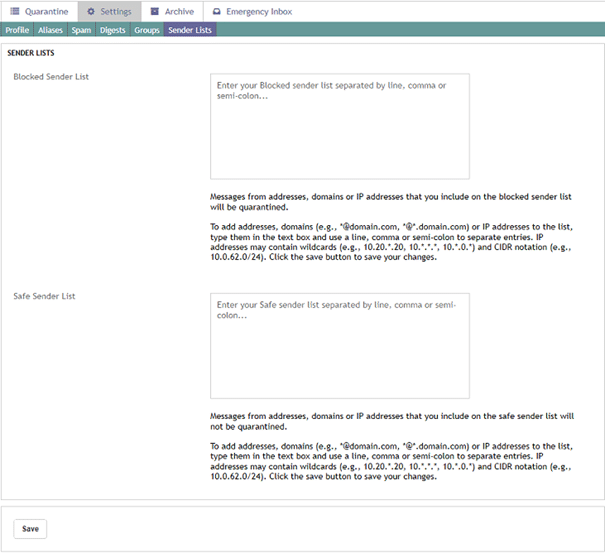
This TAB allows you to add to the Block Sender List or the Safe Sender list.
Using the previous BLOCK option from the … will add the email address to the block list.
Selecting RELEASE AND ACCEPT on any of the previous options will add the email address to the Safe Sender List.
Follow the description on the page to manually add, update or remove entries from these lists.
Select SAVE to retain the changes.
Archive
The IT Agency is NOT providing PPE archive as an option for clients.
We recommend another product for business continuity that isn’t limited to just email.
Emergency Inbox
The Emergency Inbox is automatically enabled when you email server is offline.
In the unlikely event that Office 365 is offline, you will be able to send/receive emails using this option.
After the email server comes back online PPE will deliver the emails.
You can select the option but there’s nothing to see.
